

Fish sticks to stainless steel for one reason: the proteins in the flesh bond to the metal before heat and moisture can create a natural release layer. The fix isn’t just “preheat the pan” — it’s hitting a precise temperature window, drying the fish properly, and then leaving it completely alone until it tells you it’s ready. This guide covers the full method for both skin-on fish (salmon, sea bass) and skinless fillets (cod, tilapia, halibut), plus a troubleshooting section for when it still goes wrong. Stainless steel can give you a better sear than nonstick — once you understand what’s actually happening in the pan.
Why Fish Sticks to Stainless Steel (The Real Reason)
Fish sticks when its proteins bond to the metal surface before the heat is high enough to create a vapor barrier between the food and the pan.
Here’s what’s happening at a microscopic level: raw fish proteins are water-soluble and clingy. When they contact a metal surface that isn’t hot enough, they physically bond to the steel before they have a chance to cook through and firm up. The result is exactly what you’ve experienced — you try to flip, and half the fillet stays on the pan.
The fix involves two physical principles working together:
Protein denaturation: When the pan surface is hot enough, the fish proteins that touch the metal cook almost instantly. They firm up, shrink, and lose their grip on the surface. At that point, the fish will release cleanly — not because you forced it, but because there’s nothing left to bond.
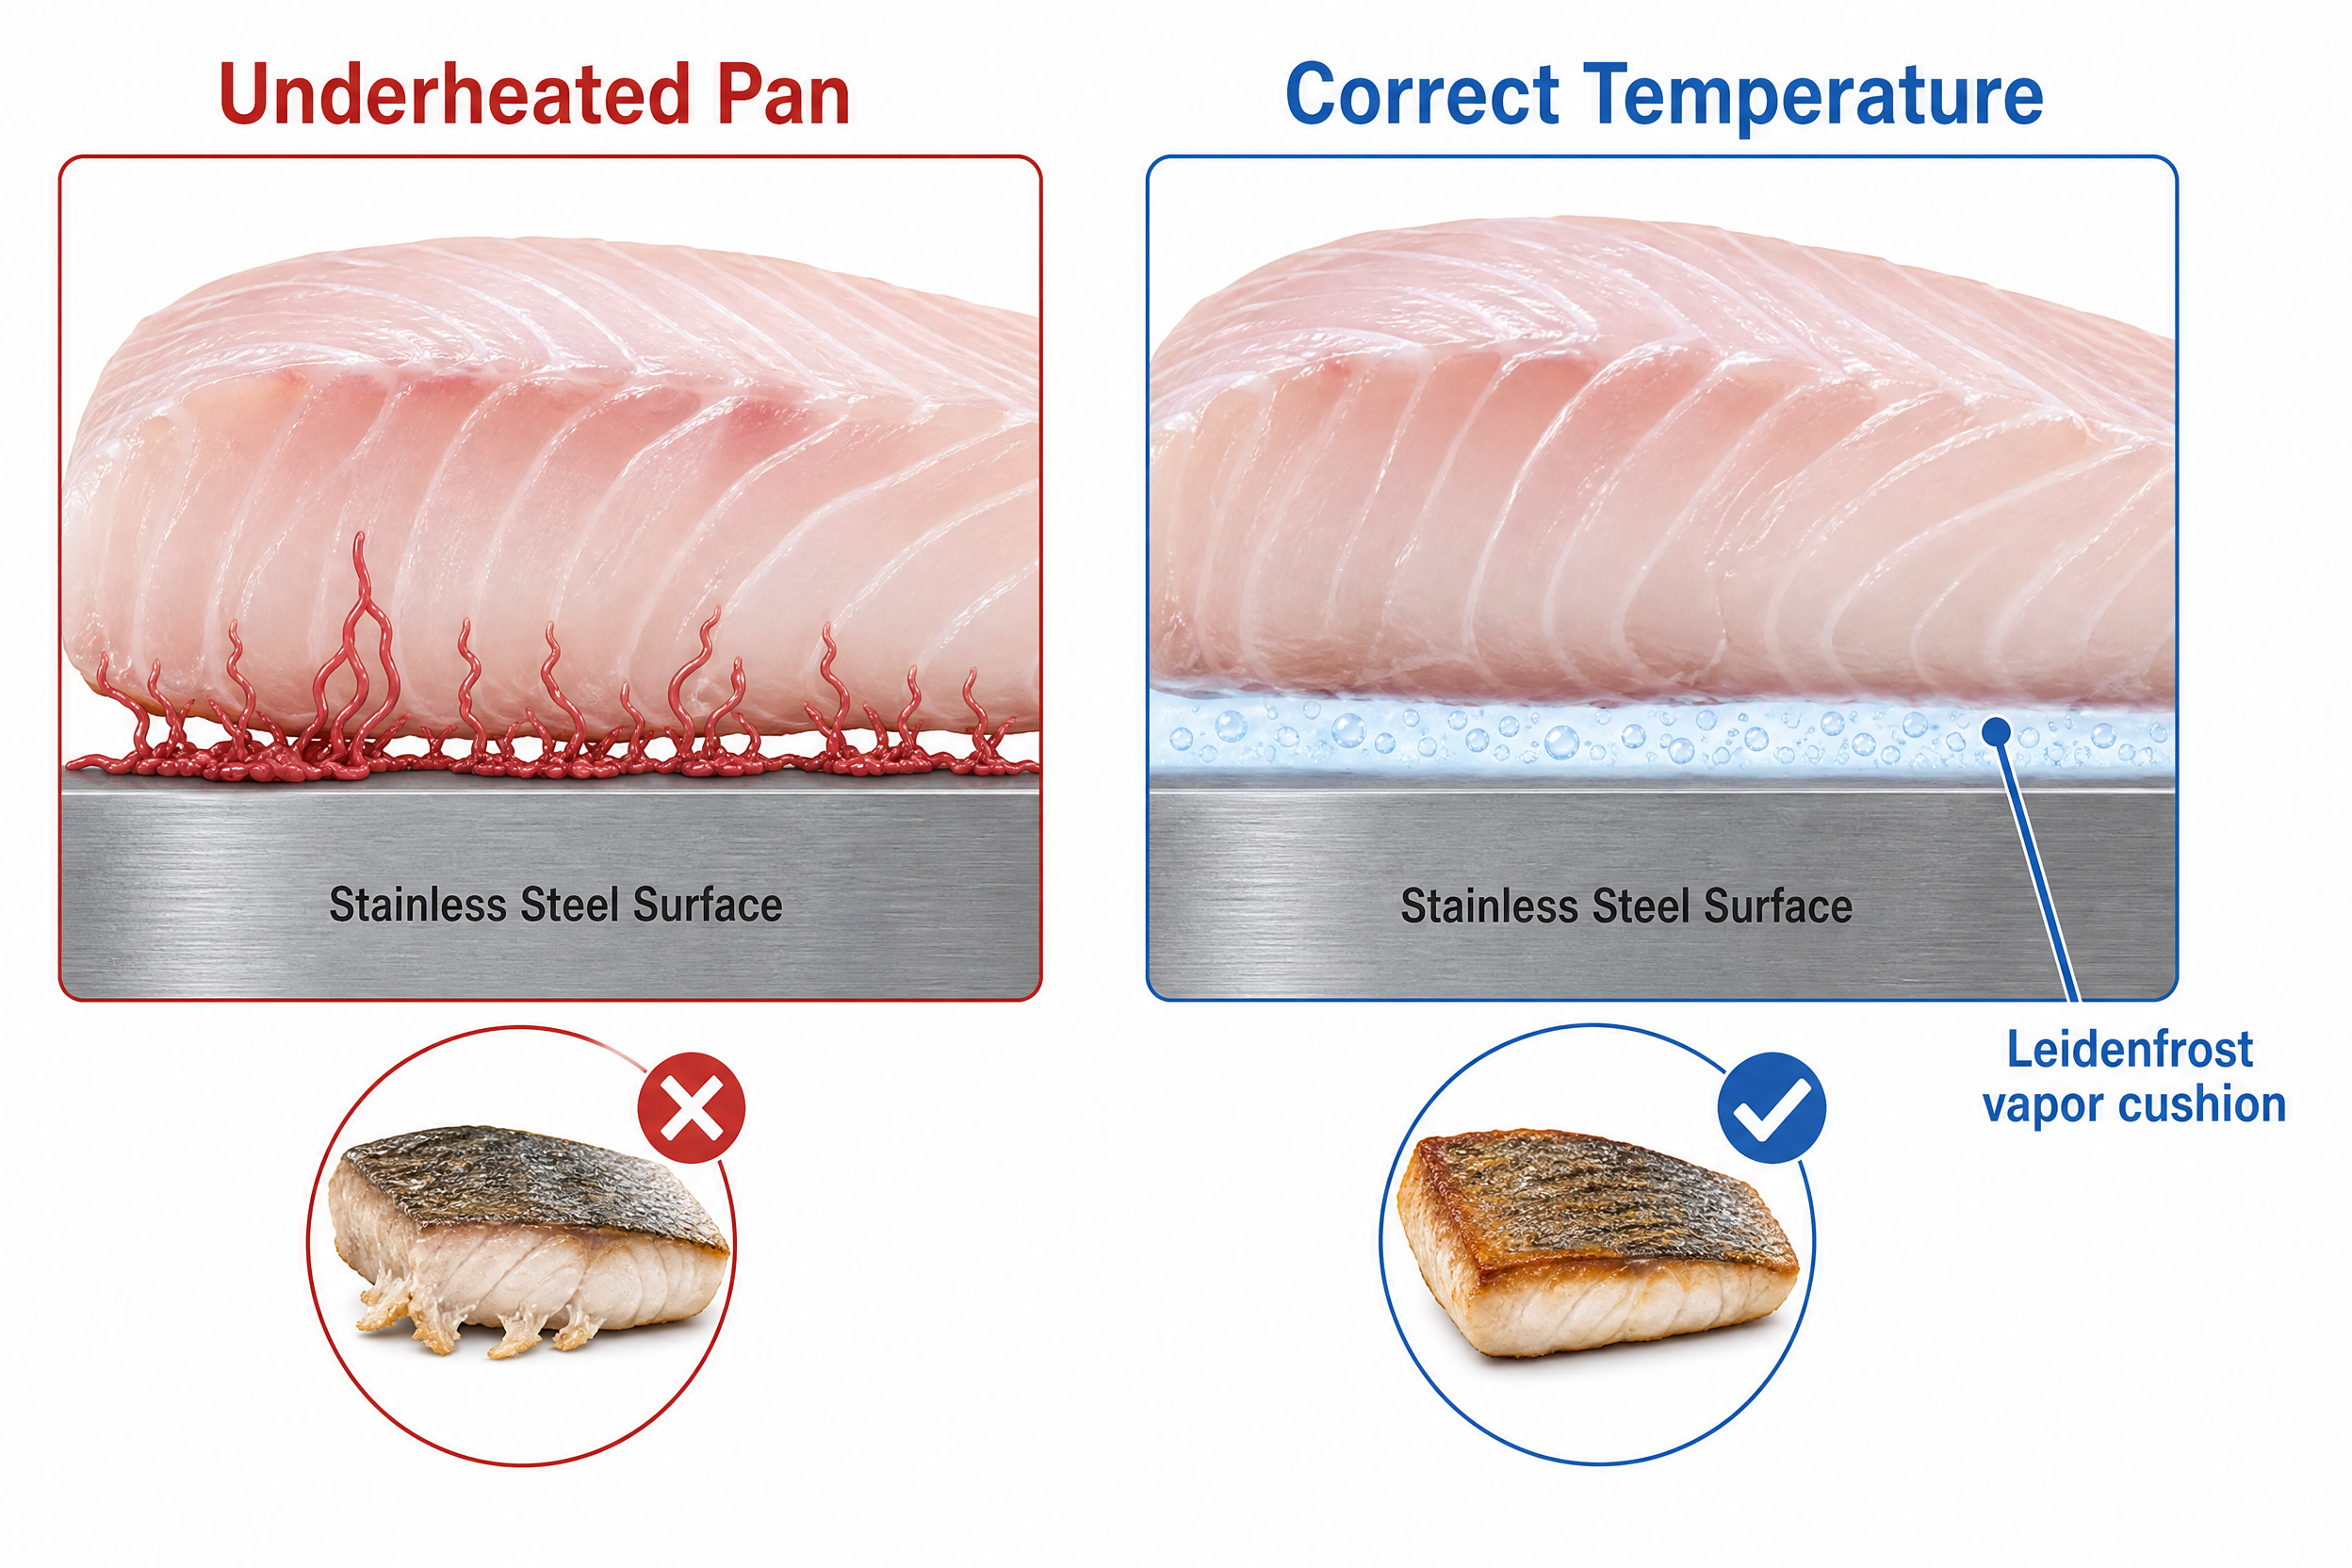
The Leidenfrost effect: This is the phenomenon behind the mercury ball / water-drop test you may have seen. When a pan surface reaches approximately 420–430°F (215–221°C) — well above water’s boiling point — droplets placed in the pan don’t boil instantly. Instead they bead up and skitter around on a cushion of steam. That same vapor cushion forms under your food when the surface is hot enough, lifting it slightly and allowing the Maillard reaction to build a crust. No crust = no release.
What this means practically: an under-heated pan is the single most common cause of stuck fish. A pan that looks hot isn’t necessarily at the right temperature. I’ve made this mistake dozens of times before I learned to test it properly.
The water-drop test is your best friend here. Drop a few water droplets into the empty pan. If they:
- Sizzle and evaporate immediately → pan is not hot enough yet
- Bead up into a single ball and roll around without evaporating → you’ve hit the Leidenfrost zone, the pan is ready
There’s a brief window between “ready” and “overheated” — once the water drops scatter into tiny beads that disappear fast, you’ve gone too far and should reduce heat slightly, then test again.
The Pre-Cook Checklist: Set Yourself Up Before the Pan Goes On
What you do before the fish hits the pan matters as much as what you do after.
Most guides skip this part. But in every batch of failed fish I’ve worked through (and I’ve burned through plenty of testing this), the failure was set up in the prep — not in the cooking itself.
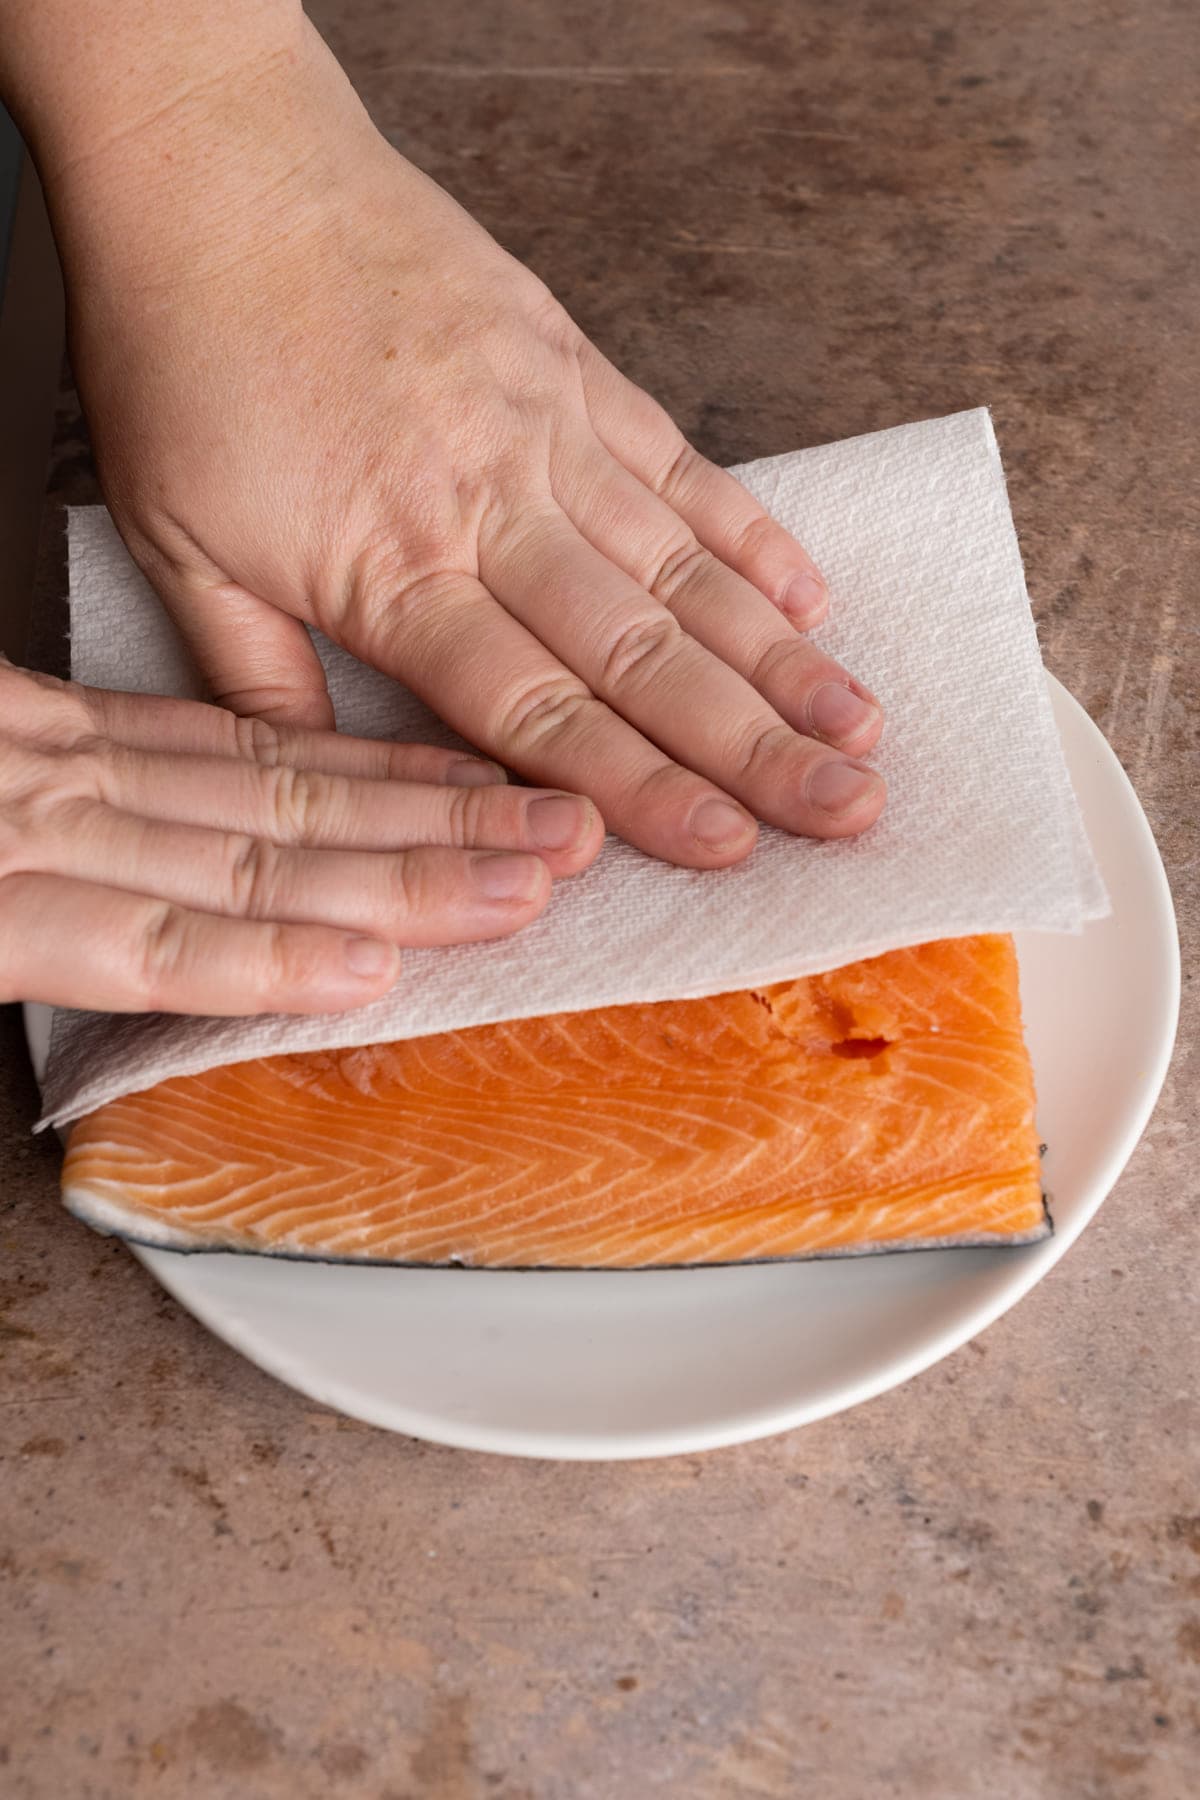
1. Dry the fish thoroughly.
This is the single biggest difference between fish that sticks and fish that releases. Moisture on the surface of the fish drops the pan temperature the moment it lands, taking you out of the Leidenfrost zone and triggering protein bonding. Pat the fillets dry with paper towels — both sides if it’s skinless, skin side especially if it’s skin-on. For fish that’s been in the refrigerator in any liquid, dry it two or three times.
If you have time, leave the fish uncovered on a wire rack in the fridge for 20–30 minutes after patting dry. The surface dries out even more and you get a noticeably better crust.
2. Bring the fish closer to room temperature.
Cold fish straight from the fridge creates a temperature shock when it hits a hot pan. The center stays cold while the exterior overcooks — and the thermal difference also promotes sticking. Pull the fish out 10–15 minutes before cooking. This is especially important for thick fillets (salmon, halibut steaks over 1 inch).
3. Season just before cooking.
Salt draws out moisture. If you salt the fish more than 5–10 minutes before cooking and don’t blot again, you’ll have moisture on the surface just when you need it dry. Either salt right before it goes in, or do a proper dry-brine 45+ minutes ahead (the moisture is reabsorbed after ~45 minutes). Anything in between is the worst of both worlds.
4. Check the skin for pin bones.
Run your finger along the flesh side and pull out any remaining bones with tweezers or needle-nose pliers. Not a sticking issue — just a quality issue that’s easier to fix cold than after cooking.
5. Score skin-on fish lightly.
If you’re cooking a fillet with skin that curls significantly (sea bass, striped bass, snapper), score the skin 2–3 times across the fillet with a sharp knife, cutting just through the skin but not into the flesh. This prevents the skin from curling up and lifting the center of the fillet off the pan, which causes uneven contact and sticking in spots.
The 4-Step Method for Skin-On Fish (Salmon, Sea Bass, Snapper)
Skin-on fish in a stainless steel pan is the most reliable path to a restaurant-quality sear — when you follow the sequence correctly.
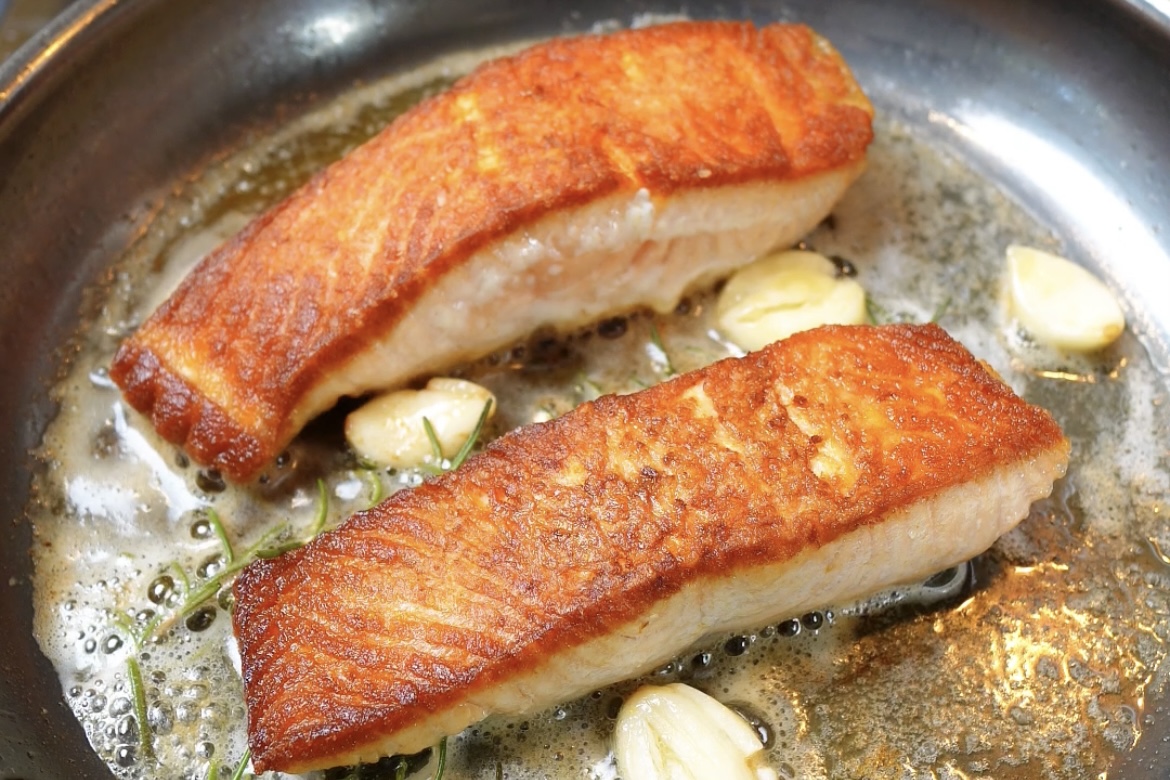
This method works for salmon fillets, sea bass, striped bass, red snapper, and any similar skin-on fillet between ½ inch and 1½ inches thick.
Step 1: Heat the empty pan.
Place your stainless steel pan on medium heat. No oil yet. Let it heat for 2–3 minutes. The reason you’re heating it dry is that adding oil too early causes it to heat unevenly and start smoking before the pan surface itself reaches the right temperature.
Test with the water-drop method: flick a few drops of water into the pan. You want to see the drops bead up into a mercury-like ball and skitter around the surface. Sizzle-and-evaporate means keep going. Beading means you’re ready.
Step 2: Add oil, swirl, then add fish immediately.
Add enough oil to coat the bottom — about 1–2 tablespoons for a 10-inch pan. Use a high-smoke-point neutral oil (canola, grapeseed, or avocado oil). Swirl to coat and add the fish within 10–15 seconds. You want the oil hot but not yet smoking when the fish goes in.
Lay the fish skin-side down, placing it away from you (so any oil splatter goes forward, not toward you). You’ll hear an aggressive sizzle — that’s exactly what you want.
Step 3: Press and leave it alone.
The skin will want to curl immediately. Press the fillet flat against the pan with a spatula for 10–15 seconds. This ensures even skin contact across the whole fillet. After that, hands off.
This is the part where most people fail. The urge to check, prod, or slide the fish is almost irresistible. Don’t. If you try to move the fish and it resists, it is not ready. A fully seared fillet will release from the pan on its own — it tells you when it’s done by letting go.
Cook skin-side down for 70–80% of the total cooking time. For a 1-inch salmon fillet, that’s typically 4–5 minutes on medium-high before you flip.
Step 4: Flip and finish.
Once the fish releases cleanly — you can tell because it will slide with no resistance when you gently push it with a spatula — flip it. The flesh side needs much less time. For a 1-inch fillet cooked to medium (just opaque through the center), that’s about 1–2 minutes on the flesh side.
If you want to add butter at this point, do it now. Add a tablespoon of butter, let it foam, and spoon it over the flesh as it finishes. This is the oil-first, butter-finish technique: oil handles the high-heat sear, butter adds richness and flavor without burning.
Remove from heat. Let the fish rest for 1–2 minutes before serving — the internal temperature continues to rise slightly and the juices redistribute.
Cooking Skinless Fish Fillets (Cod, Tilapia, Halibut, Sole)
Skinless fillets are more fragile than skin-on fish and require a slightly different approach — but stainless steel can still handle them well.
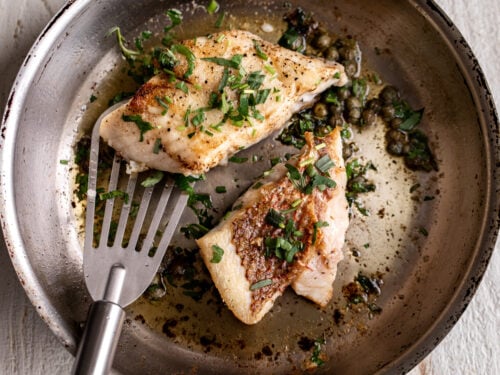
Most guides focus entirely on salmon with skin and treat skinless fillets as an afterthought. Cod, tilapia, halibut, and sole are common, affordable, and behave very differently under heat. The skin was a protective layer that helped hold the fillet together during cooking; without it, the fish is more prone to tearing.
The key difference: lower heat + patience.
With skinless fish, you don’t want to blast it with high heat. The goal isn’t a crusty sear — it’s a clean, firm surface that releases without falling apart. Here’s how to do it:
1. Follow the same preheat protocol — dry pan, water-drop test, then add oil. But for skinless fillets, reduce the heat to medium (not medium-high) before adding the fish. You want the pan to sizzle, not aggressively crackle.
2. Coat the fish lightly in oil (optional but helpful for skinless). Brush or rub a small amount of oil directly onto both sides of the fillet before it goes in. This creates a thin, even oil layer on the fish surface itself, supplementing the oil in the pan and giving the proteins a better chance to firm up cleanly.
3. Use a fish spatula. A regular wide spatula works for salmon, but for delicate skinless fillets, a thin flexible fish spatula (sometimes called a slotted fish turner) makes a real difference. It slides under the fillet without tearing the flesh.
4. Cook longer on the first side. With no skin to act as insulation, the first side needs time to build a firm surface. A ¾-inch cod fillet typically takes 3–4 minutes before it will release. Same rule applies: if it resists when you try to move it, leave it. It’s not ready.
5. Steam-finish option for very delicate fish. For sole, thin tilapia, or any fillet under ½ inch, you can add a splash of water or white wine (1–2 tablespoons) to the pan after the first side sets, then immediately cover with a lid. The steam cooks the top side without requiring a flip. This eliminates the risk of the fillet breaking apart entirely when you try to turn it.
Skinless fish that works particularly well in stainless:
- Cod and haddock (firm enough to handle with care)
- Halibut steaks (thick and forgiving)
- Tilapia (requires the steam-finish on thin pieces)
- Mahi-mahi (dense and holds together well)
Oil and Fat: What to Use and When
The oil you choose affects whether the fish sticks, how it tastes, and how much smoke fills your kitchen.
The core requirement for searing fish is an oil with a smoke point above 375°F (190°C). Below that, the oil starts breaking down and smoking before the fish is done — and burning oil makes everything taste bitter and stick more.
| Oil | Smoke Point | Flavor | Best For |
|---|---|---|---|
| Avocado oil | ~520°F (271°C) | Neutral | High-heat sears, all fish |
| Grapeseed oil | ~420°F (216°C) | Very neutral | All-purpose searing |
| Canola oil | ~400°F (204°C) | Neutral | Everyday use |
| Vegetable oil | ~400°F (204°C) | Neutral | Everyday use |
| Refined coconut oil | ~400°F (204°C) | Subtle coconut | Adds slight flavor |
| Extra virgin olive oil | ~375°F (190°C) | Fruity | Lower heat cooking only |
| Butter (unsalted) | ~350°F (177°C) | Rich, nutty | Finishing, not searing |
The oil-first, butter-finish technique:
This is what restaurants do. You start with a high-smoke-point oil for the actual sear, then add butter in the final 1–2 minutes of cooking. The butter doesn’t have to survive the searing heat — it just needs to foam and baste the fish as it finishes.
To do it: add a tablespoon of unsalted butter after you’ve flipped the fish. Let it foam. Tilt the pan slightly and use a spoon to baste the fish repeatedly with the foaming butter. Add a garlic clove or fresh thyme if you want. This technique gives you the best of both worlds — a clean, non-burned sear plus the rich flavor of butter.
Why not butter alone? Butter is mostly fat, but it contains milk solids that burn at relatively low temperatures (~300°F). Using butter alone on a properly preheated stainless steel pan almost guarantees burning before the fish is cooked through. Clarified butter (ghee) is the exception — with the milk solids removed, it has a smoke point around 450–485°F and works for searing.
How much oil? Enough to coat the pan bottom in a thin, even layer — approximately 1–2 tablespoons for a 10-inch pan. Too little and you get dry spots where the fish makes direct contact with uncoated steel. Too much and you’re shallow-frying, which changes the texture.
Troubleshooting: Why It Still Stuck
If you followed the steps and the fish still stuck, one of these is the cause.
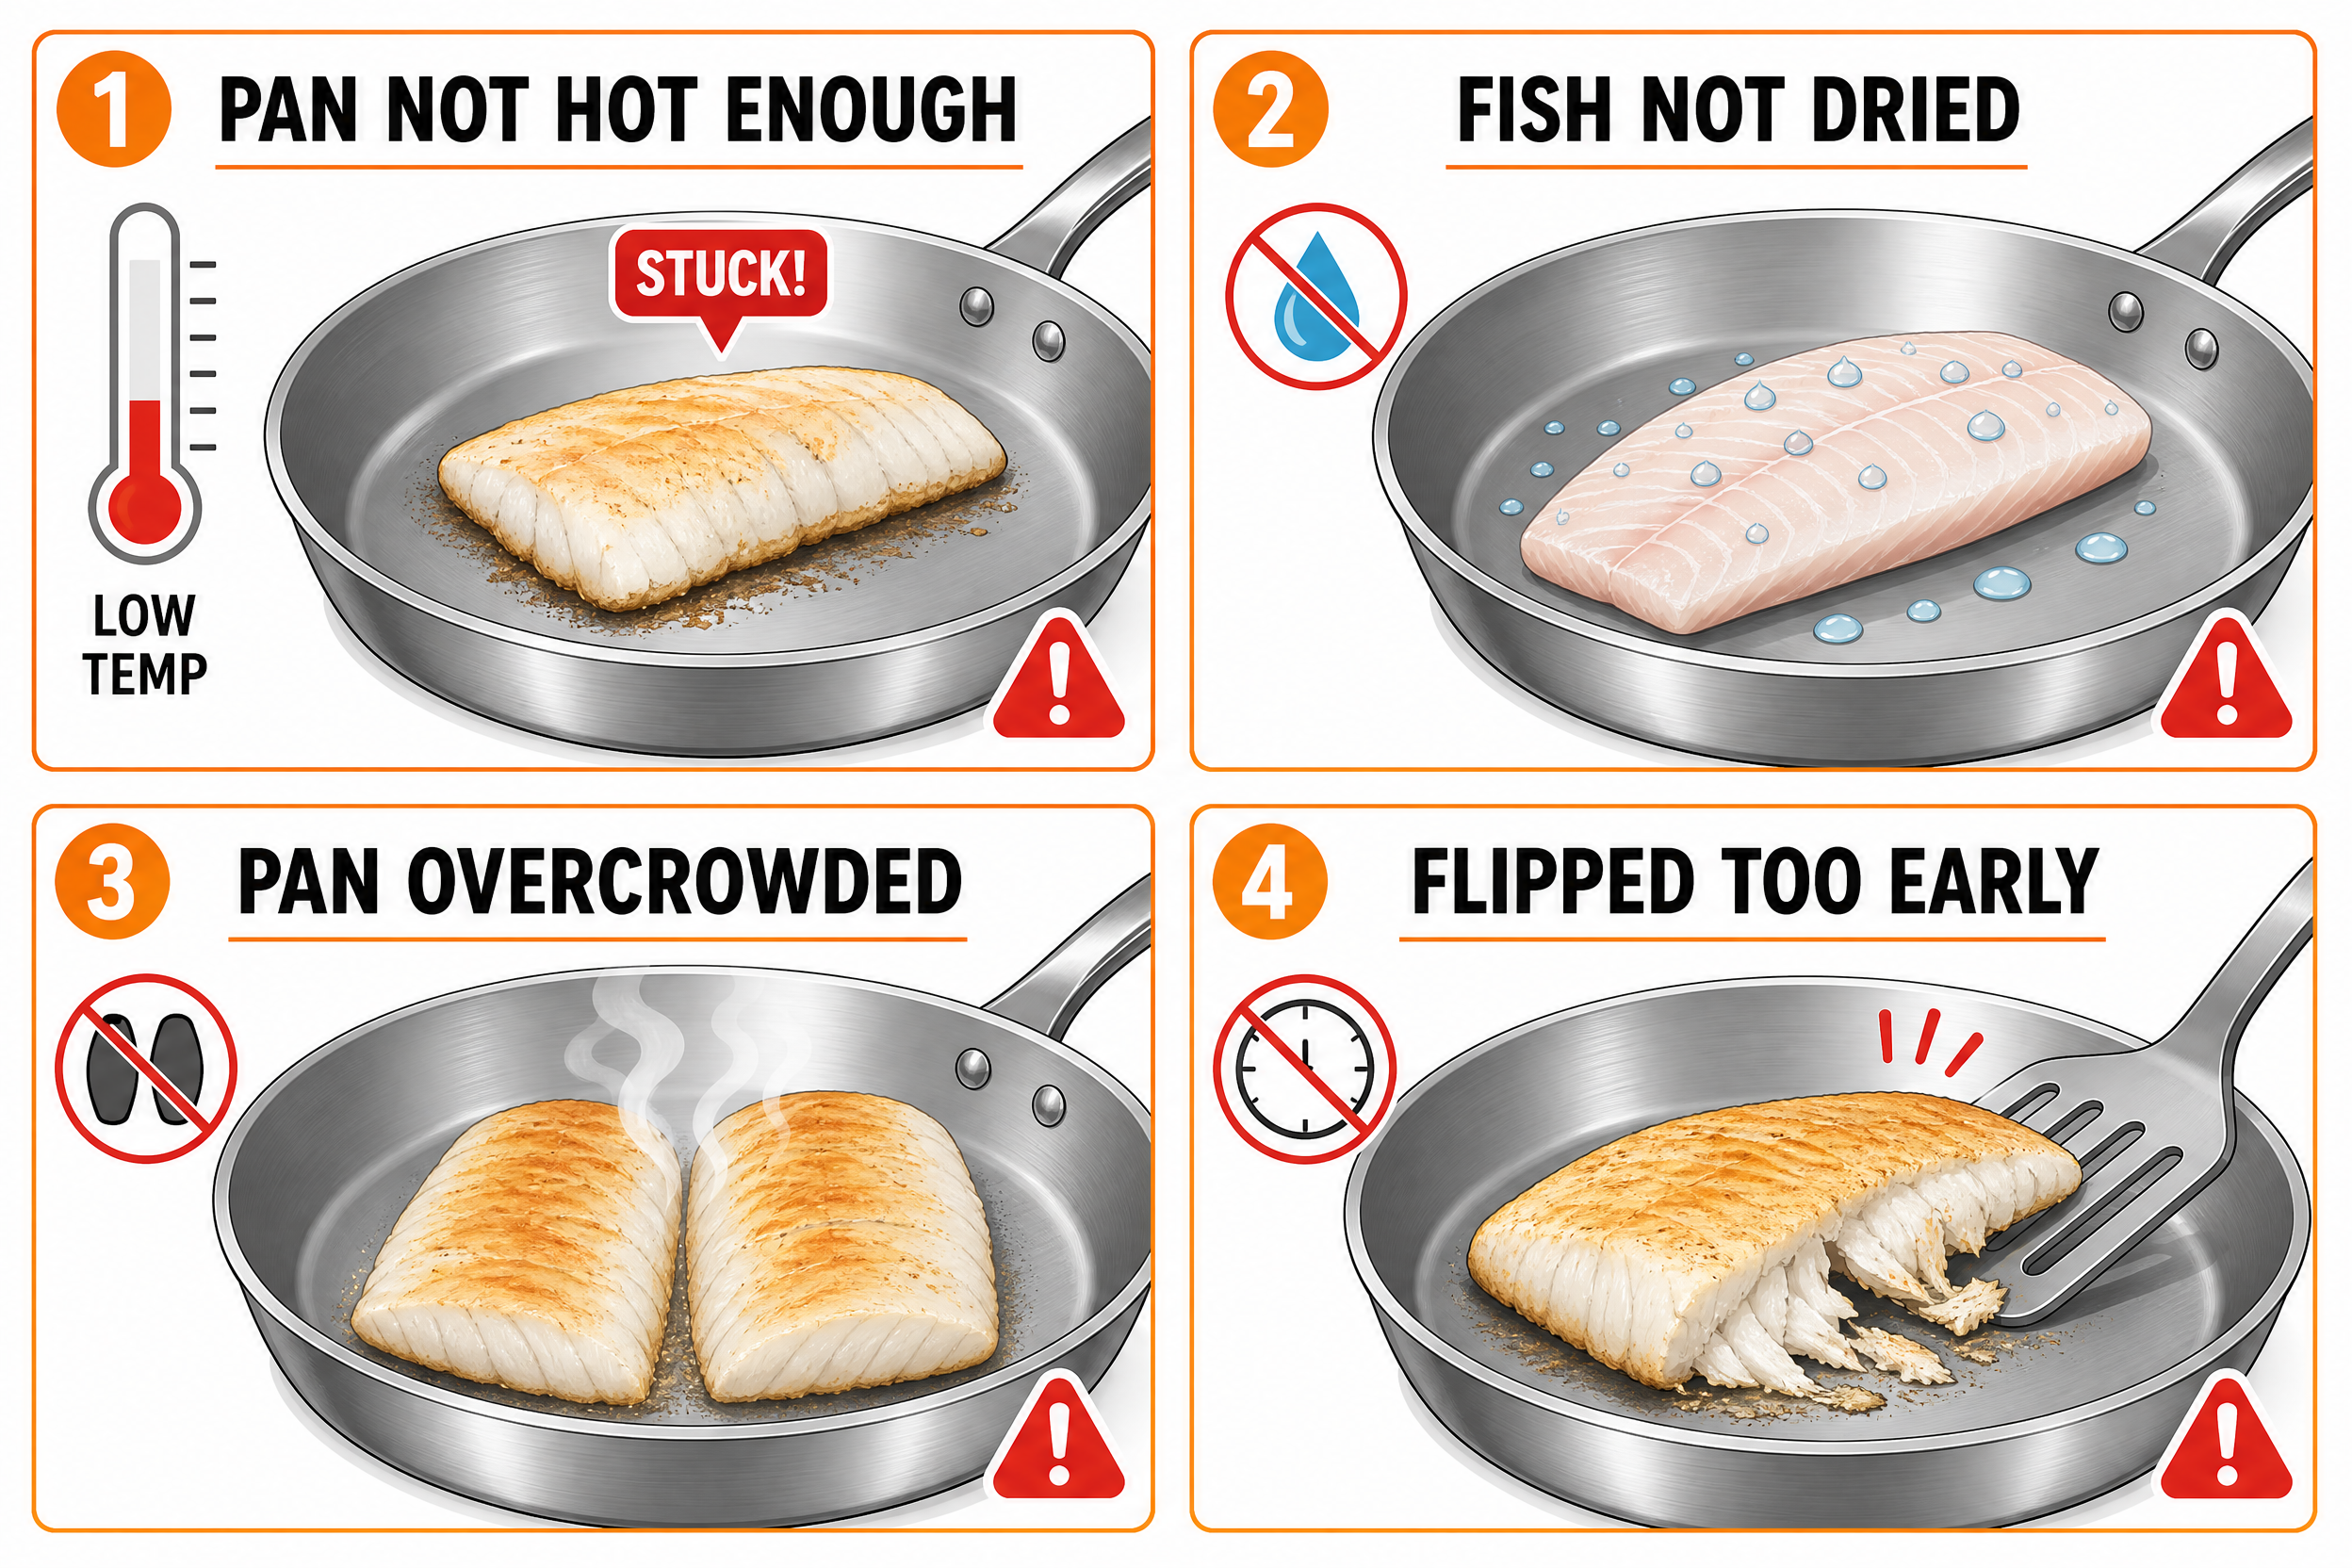
This is the section most guides leave out, which is exactly why people keep failing. “Preheat, add oil, don’t move it” is correct advice — but it doesn’t tell you what went wrong when it didn’t work.
Problem 1: The pan wasn’t actually hot enough.
This is responsible for maybe 60% of failed fish in stainless steel. The pan looked hot and felt hot, but hadn’t reached the Leidenfrost threshold. Middle burners on home stoves often produce less heat than expected, and induction requires a different warm-up curve than gas.
Fix: Do the water-drop test every time. Don’t skip it. If the water sizzles and disappears, the pan needs more time. Only when it beads up are you ready.
Problem 2: The fish was wet.
Even a small amount of surface moisture is enough to drop the pan temperature below the sticking threshold the moment the fish lands. You can feel this — instead of a loud aggressive sizzle, you’ll hear a more muffled, watery sound.
Fix: Pat dry, wait a minute, pat dry again. If the fish has been marinated, dry it especially thoroughly — marinades leave behind a coating that holds moisture.
Problem 3: You tried to move it too soon.
The fish wasn’t done building its crust and you tried to lift it. The crust that forms during the sear is what creates the natural release. Interrupt that process and you pull half the fish off with the spatula.
Fix: Gentle nudge test — push the fillet softly with a spatula every 30 seconds after the first 3 minutes. If it moves freely, it’s ready. If it resists, it’s not. Wait.
Problem 4: Overcrowding the pan.
Two or more fillets that are too close together trap steam between them. Instead of searing, the fish steams. Steam lowers the surface temperature and promotes sticking because the proteins never get to the denaturation threshold cleanly.
Fix: Leave at least 1 inch of space between fillets. For large batches, cook in two separate pans or in two separate rounds. Let the pan reheat between batches.
Problem 5: The pan had residue from a previous cook.
Burnt oil or food residue on the pan surface creates an uneven contact layer. The fish doesn’t sit flat against the steel — it sits against old burned material, which has terrible release properties.
Fix: Clean the pan properly between uses. For stainless steel, a Barkeeper’s Friend scrub removes discoloration and built-up residue that regular washing misses.
Problem 6: The fish was very fresh and very thin.
Very fresh fish (same-day or next-day) has more moisture than older fish. Combined with a thin fillet (under ½ inch), there’s very little margin for error. Consider the steam-finish method for thin fresh fillets.
Timing Guide by Thickness
Cooking time depends primarily on fillet thickness, not weight.
This table assumes medium-high heat for skin-on fish and medium heat for skinless fillets, on a properly preheated stainless steel pan. “Done” means opaque through the thickest part for white fish, or just slightly translucent in the very center for salmon (medium doneness).
| Fillet Thickness | Skin-On (first side) | Skin-On (flip side) | Skinless (first side) | Skinless (flip or steam) |
|---|---|---|---|---|
| Under ½ inch | 2–3 min | 30–60 sec | 2 min | Steam-finish 1–2 min |
| ½–¾ inch | 3–4 min | 1–2 min | 3 min | 1–2 min |
| ¾–1 inch | 4–5 min | 1–2 min | 4 min | 2 min |
| 1–1½ inches | 5–6 min | 2–3 min | 5 min | 2–3 min |
| Over 1½ inches | Sear + oven finish | — | Sear + oven finish | — |
For very thick fillets (over 1½ inches, like a thick halibut steak or center-cut salmon portion), use the stovetop-to-oven method: sear in stainless steel on the stovetop, then transfer the pan to a 375°F (190°C) oven to finish cooking through. Stainless steel pans are oven-safe; this is one place where they outperform nonstick pans, which typically have temperature limits.
The 10-minute rule (mentioned in many fish-cooking guides): cook fish for 10 minutes per inch of thickness at medium-high heat. This is a reasonable starting point but doesn’t account for starting temperature, heat intensity, or how “done” you want the fish. Use it as a rough estimate, not a hard rule. The release test is more reliable than a timer.
Internal temperature targets (using an instant-read thermometer):
- White fish (cod, halibut, tilapia): 130–135°F (54–57°C) for tender, flaky texture; FDA recommends 145°F (63°C) for food safety
- Salmon: 125–130°F (52–54°C) for medium; 145°F (63°C) for fully cooked through
- Tuna steaks: 110–115°F (43–46°C) for medium-rare; 120–125°F (49–52°C) for medium
Frequently Asked Questions
How do I stop fish from sticking to my stainless steel pan?
The three most important steps: (1) dry the fish thoroughly before it goes in, (2) preheat the pan to the Leidenfrost temperature — water drops should bead up and roll around rather than sizzle and evaporate, and (3) don’t try to move the fish until it releases on its own. A properly seared fish will slide freely when it’s ready.
Should I use butter or oil to cook fish in a stainless steel pan?
Use a high-smoke-point oil (avocado, grapeseed, or canola) for the initial sear. Add butter only in the last 1–2 minutes after flipping, and baste the fish with the foaming butter using a spoon. Butter alone burns at the temperatures needed to sear fish properly.
Should you cook fish in a stainless steel pan?
Yes — stainless steel produces a better sear than nonstick because it retains heat more consistently and doesn’t have a coating that limits how high you can go. Nonstick pans are easier for beginners, but they don’t build the same crust. Once you learn the preheat method, stainless is the better pan for crispy-skin fish.
What is the 10-minute rule for fish?
The 10-minute rule is a cooking guide suggesting 10 minutes of cooking time per inch of fillet thickness at medium-high heat. It’s a useful starting estimate, but it’s not precise — it doesn’t account for starting temperature, pan heat intensity, or how the fish is positioned. The “natural release” test (the fish slides freely when it’s ready) is more reliable.
Can I cook skinless fish in a stainless steel pan without it falling apart?
Yes, with two adjustments: use slightly lower heat (medium instead of medium-high) and consider the steam-finish method for thin fillets under ½ inch. For skinless cod or tilapia, coat the fish lightly in oil before it goes in, wait for it to fully release before moving it, and use a thin flexible fish spatula.
Why does fish stick even when I add plenty of oil?
The most likely cause is that the pan wasn’t hot enough before the oil went in, or the oil was added too early and cooled as the pan continued heating. Always preheat the pan dry first, confirm with the water-drop test, then add oil and fish in quick succession. Too much cold oil can also drop the pan temperature enough to undo the preheat.
What stainless steel pan is best for fish?
A tri-ply or multi-ply stainless steel pan (stainless exterior, aluminum or copper core, stainless cooking surface) heats more evenly than single-ply steel, which can create hot spots. A 10-inch or 12-inch skillet handles most single-portion or two-portion cooks. Brands like All-Clad, Made In, and Misen use tri-ply construction.
Final Thoughts
Cooking fish in stainless steel is genuinely harder than using nonstick — at first. The margin for error is narrower, and the consequences of getting it wrong (stuck, torn, steamed instead of seared) are immediate.
But the ceiling is higher. When it works — properly dried fish, pan at the right temperature, left completely alone until it tells you it’s ready — you get a crust that nonstick simply can’t produce. The skin is shatteringly crisp. The surface has texture and color. The fond left in the pan is the start of a real pan sauce.
The principles are simple: understand why fish sticks, remove the conditions that cause it, and trust the process. The fish will tell you when it’s ready. That’s the one thing no timer can replace.